Mostrando entradas con la etiqueta trabajo en progreso. Mostrar todas las entradas

lunes, 21 de enero de 2013

Copia un Van Dyck - Copy a Van Dyck

 
Ejercicio final del curso de Pintura III - copia un retrato de Van Dyck
Óleo sobre lienzo, tamaño A3
Final exercice of Painting III course - copy a portrait by Van Dyck
Oil on canvas, size A3

Aún me falta muuucho por aprender, pero definitivamente estoy contenta con mi avance.  Tengo mil críticas a mi trabajo, tanto en dibujo como en pintura.  Creo que lo que más me llama la atención es el resultado que siempre tira a la ilustración... debo ser ilustradora de corazón jijiji

I still have sooooo much to learn, but I am definitely very happy with what I'm learning.  I have thouthands of critics to my work, both in the drawing and in the painting aspects.  But I thing that what jumps closer to my attention is that my results usually tend to be more illustrative than painterly... there must be an illustrator inside of me... hehehe

El proceso - the process


Final


Mi referencia: pintura original de Van Dyck
My reference:  original Van Dyck's painting


lunes, 14 de enero de 2013

Bodegón con valoración completa - Still Life with Complete Value Range

Estudio de bodegón, lápiz carbón Pitt sobre cartulina para acuarela, 64.5 x 50.5 cm aprox.
Still life study, charcoal Pitt pencil on watercolor heavy paper, 25.8 x 20.2 " appx.

El proceso - process:


lunes, 7 de enero de 2013

Segundo bodegón con Sepia y Sanguina - Second Still Life with Sepia and Sanguine


Este fue el segundo (y último) bodegón con sanguina y sepia que hicimos en clase, ahora sobre cartulina blanca, 64.5 cm x 50.5 cm aprox.
 
This is the second (and last) still life that we made with sepia and sanguine in class, now over white Canson cardboard, 25.8 x 20.2 " appx
 
El proceso - the process:


jueves, 3 de enero de 2013

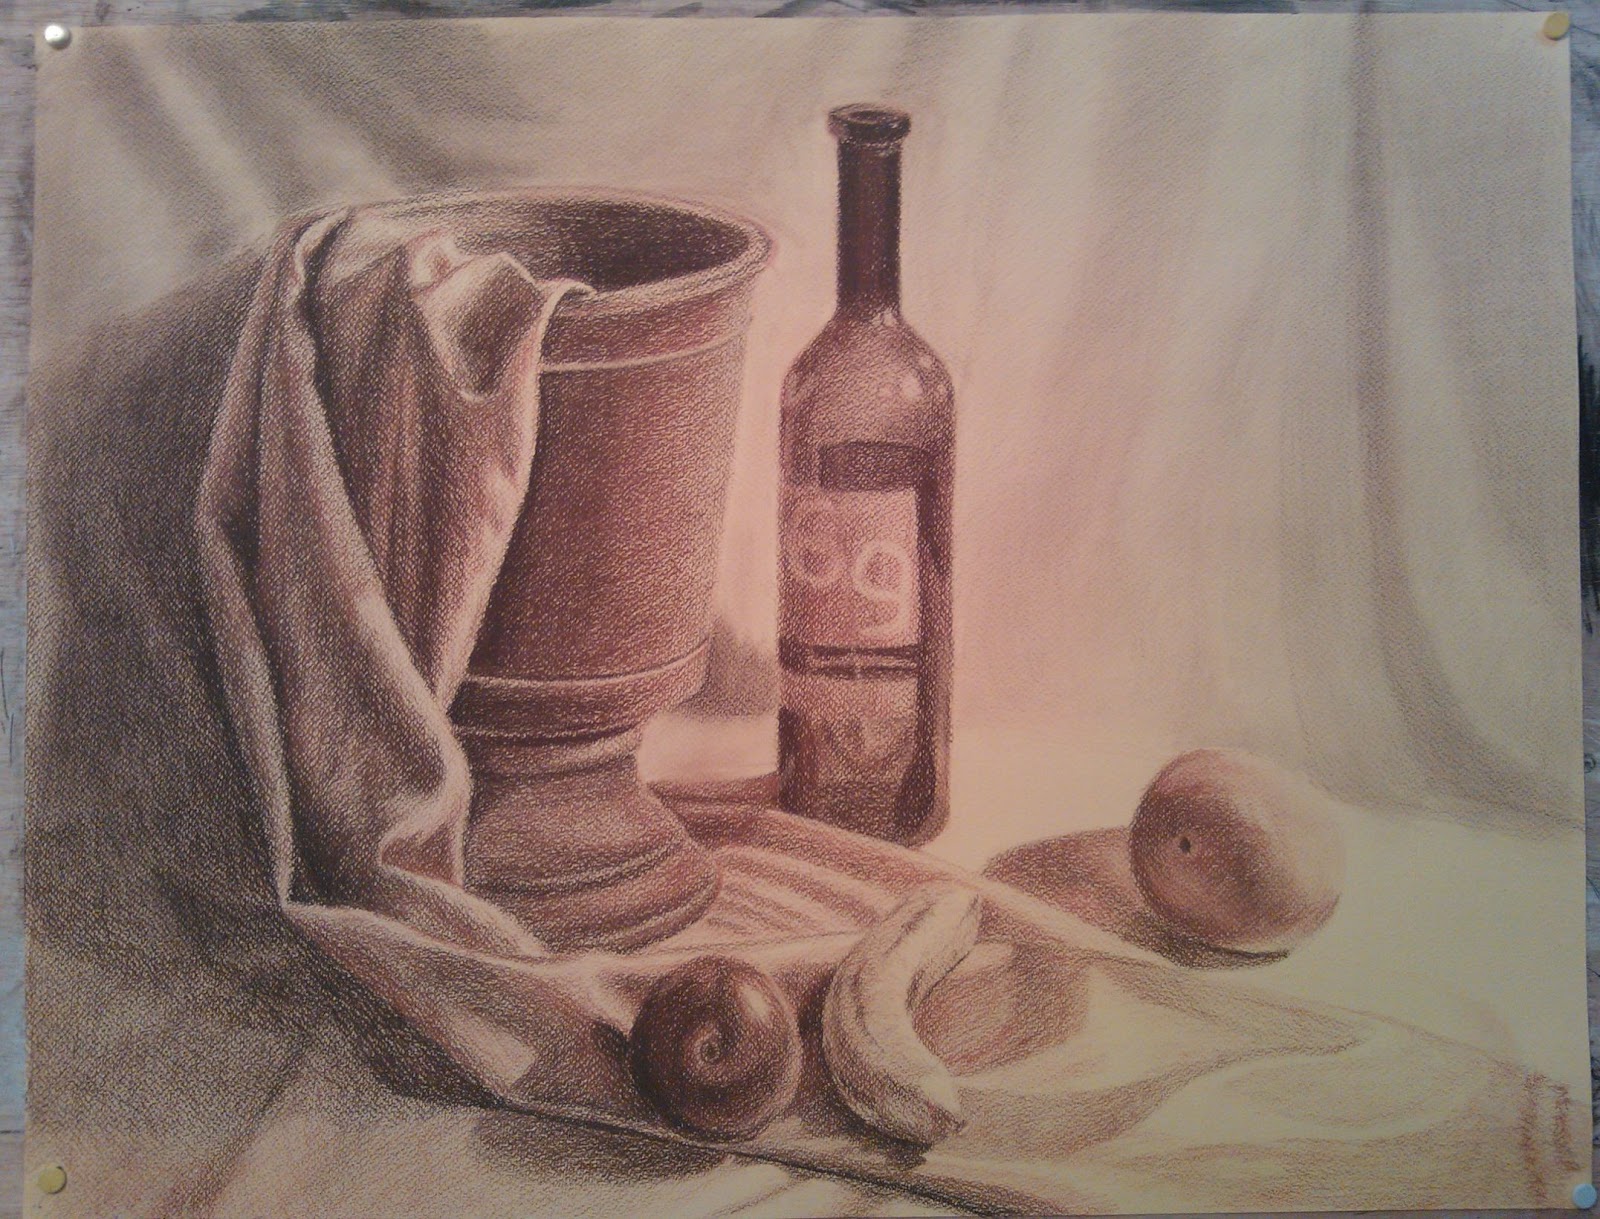
Bodegón con Sanguina y Sepia - Still life with Sanguine and Sepia

 
Bodegón con sepia y sanguina, cartulina Canson crema, 64.5 x 50.5 cm aprox.
Still life with sepia and sanguine pencils, Canson 180g paper, 25.8 x 20.2 " appx.


Este bodegón lo hicimos en la clase de Dibujo.  Usamos una cartulina de color crema como base y sólo lápices de sanguina y sepia.  Fue un ejercicio difícil, porque no sabía cómo lograr algo visualmente atractivo sólo con ambos lápices.  El profesor decía que había que hacer una especie de "sandwich" con las capas de colores.  Definitivamente mi experiencia previa con los lápices de colores (y sus múltiples capas) me resultó muy útil.  Pude ver que fui, dentro de todo, una de las que menos sufrió de toda la clase. Al menos eso creo...

We made this still life at Drawing class.  We used a cream colored cardboard as the base and only a sanguine and a sepia pencils.  It was a hard excercise, because I didn't know how to achieve something visualy attractive using only the two colors.  My previous experience with colored pencils (and their multiple layers) resulted very handy for me most definitely.  I could see that I was among the students who suffered the less with this excercise in the class... at least that's what I think...

Y a continuación, las fotos del proceso.  Algunas de las fotos las tomé con el celular y otras con la cámara, por eso se ven un poco distintas.

And now, the work-in-process photos.  I took some of them with the cell phone and others with the camera, that's why they don't look all the same.


El resultado final - The final result
 
El "modelo" - The "life model"
 

¡¡¡Feliz Año 2013!!!


Happy New Year 2013!!!


Bonne Année 2013!!!


jueves, 15 de noviembre de 2012

Dibujo de bodegón - Still life drawing

Esta vez pongo un par de ejercicios de bodegón sobre papel negro con lápiz blanco (pastel duro).
This time I'm posting a couple of exercises of still life made on black paper with white pencil (hard pastel).

Este fue el primer bodegón de este tipo, primero tuvimos que hacer una escala tonal (la ven a la derecha), como orientación
This is the first still life of this kind we made, we first had to do a tonal scale (which you can see to the right) as a guide

Este fue el segundo bodegón con esta técnica... abajo dejo las fotos de mi proceso
This is the second still life with this technique... my wip photos are below
 
 
En la primera clase sólo logré hacer el dibujo delineado; este es el resultado de la segunda clase
I only got to finish the outline on the first class, this is the result of the second
 

Logros de la tercera clase
Achievements of the third class
 
Tratando de terminar, pero tuve problemas con la iluminación de la pared del fondo
Trying to finish, but I had problems with the lighting on the background wall

El resultado final, lo mejor que logré arreglar la bendita pared
The final result, showing my best efforts to fix that silly wall


viernes, 16 de diciembre de 2011

Bodegón Amarillo

Bodegón Amarillo - Óleo sobre lienzo - 65 x 54 cm
Yellow Still Life - Oil on canvas - 26 x 21.6 "

Este es el último bodegón que hicimos este año en la clase de pintura.  Estoy contenta con el resultado.  Me tomó bastante tiempo terminarlo (el termo de la izquierda solamente me tomó 6 horas).  Esta vez comencé con los objetos y dejé el fondo para el final (algo que supuestamente no debemos hacer, sino todo lo contrario).  Pero quería empezar por la parte "fácil" (se me hace muy difícil pintar esas telas del fondo... lo que he logrado aquí no se parece mucho a las telas reales, sino más bien son una especie de síntesis, y gracias a esto lo terminé más rápido).

Y una pequeña recomendación:  ¡NO manchar con colores oscuros como hice aquí, es casi imposible cubir ese tono con amarillo!

Yellow Still Life

This is the last still life we made at painting class this year. I'm proud of the result. It took me a really long time to finish it (only the hot water carafe on the left took me 6 hours). This time I started with the objects and left the background last (something we're not supposed to do, we're supposed to do the opposite). But I wanted to start with the "easy" part (I find the drapery background too hard... what I have achieved here does not look quite like the real drapery, I kind of "synthesized" it and finished it in almost no time at the end).

One recommendation: DON'T underpaint with dark colors like we did, it's almos impossible to cover with yellow later!!!


Tuve que cubrir todo el fondo con anaranjado para cubrir la mancha oscura
I had to cover everything in the background with orange to cover the dark underpainting

Y luego incluso añadí blanco encima para poder pintar los distintos amarillos...
And later I had to add white all over to be able to add the different yellows...


Related Posts with Thumbnails