Mostrando entradas con la etiqueta WIP. Mostrar todas las entradas

lunes, 14 de enero de 2013

Bodegón con valoración completa - Still Life with Complete Value Range

Estudio de bodegón, lápiz carbón Pitt sobre cartulina para acuarela, 64.5 x 50.5 cm aprox.
Still life study, charcoal Pitt pencil on watercolor heavy paper, 25.8 x 20.2 " appx.

El proceso - process:


jueves, 3 de enero de 2013

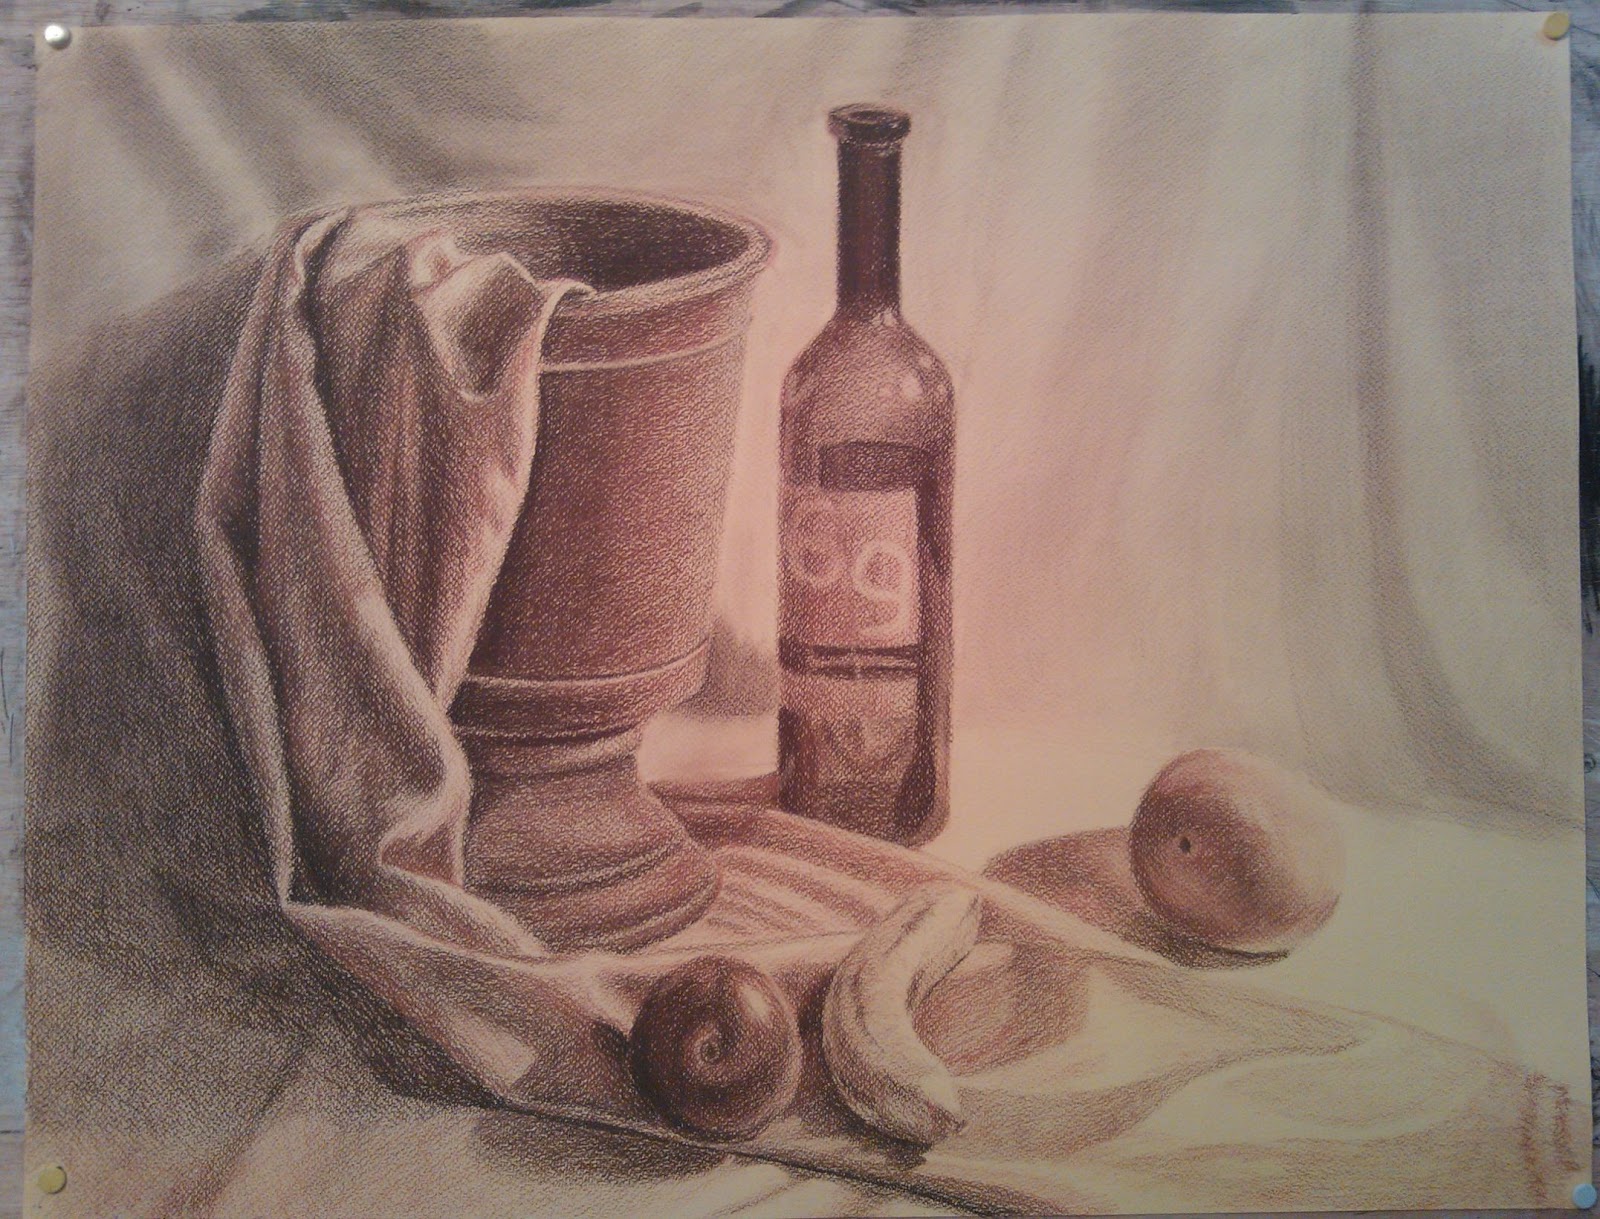
Bodegón con Sanguina y Sepia - Still life with Sanguine and Sepia

 
Bodegón con sepia y sanguina, cartulina Canson crema, 64.5 x 50.5 cm aprox.
Still life with sepia and sanguine pencils, Canson 180g paper, 25.8 x 20.2 " appx.


Este bodegón lo hicimos en la clase de Dibujo.  Usamos una cartulina de color crema como base y sólo lápices de sanguina y sepia.  Fue un ejercicio difícil, porque no sabía cómo lograr algo visualmente atractivo sólo con ambos lápices.  El profesor decía que había que hacer una especie de "sandwich" con las capas de colores.  Definitivamente mi experiencia previa con los lápices de colores (y sus múltiples capas) me resultó muy útil.  Pude ver que fui, dentro de todo, una de las que menos sufrió de toda la clase. Al menos eso creo...

We made this still life at Drawing class.  We used a cream colored cardboard as the base and only a sanguine and a sepia pencils.  It was a hard excercise, because I didn't know how to achieve something visualy attractive using only the two colors.  My previous experience with colored pencils (and their multiple layers) resulted very handy for me most definitely.  I could see that I was among the students who suffered the less with this excercise in the class... at least that's what I think...

Y a continuación, las fotos del proceso.  Algunas de las fotos las tomé con el celular y otras con la cámara, por eso se ven un poco distintas.

And now, the work-in-process photos.  I took some of them with the cell phone and others with the camera, that's why they don't look all the same.


El resultado final - The final result
 
El "modelo" - The "life model"
 

¡¡¡Feliz Año 2013!!!


Happy New Year 2013!!!


Bonne Année 2013!!!


jueves, 15 de noviembre de 2012

Dibujo de bodegón - Still life drawing

Esta vez pongo un par de ejercicios de bodegón sobre papel negro con lápiz blanco (pastel duro).
This time I'm posting a couple of exercises of still life made on black paper with white pencil (hard pastel).

Este fue el primer bodegón de este tipo, primero tuvimos que hacer una escala tonal (la ven a la derecha), como orientación
This is the first still life of this kind we made, we first had to do a tonal scale (which you can see to the right) as a guide

Este fue el segundo bodegón con esta técnica... abajo dejo las fotos de mi proceso
This is the second still life with this technique... my wip photos are below
 
 
En la primera clase sólo logré hacer el dibujo delineado; este es el resultado de la segunda clase
I only got to finish the outline on the first class, this is the result of the second
 

Logros de la tercera clase
Achievements of the third class
 
Tratando de terminar, pero tuve problemas con la iluminación de la pared del fondo
Trying to finish, but I had problems with the lighting on the background wall

El resultado final, lo mejor que logré arreglar la bendita pared
The final result, showing my best efforts to fix that silly wall


viernes, 16 de diciembre de 2011

Bodegón Amarillo

Bodegón Amarillo - Óleo sobre lienzo - 65 x 54 cm
Yellow Still Life - Oil on canvas - 26 x 21.6 "

Este es el último bodegón que hicimos este año en la clase de pintura.  Estoy contenta con el resultado.  Me tomó bastante tiempo terminarlo (el termo de la izquierda solamente me tomó 6 horas).  Esta vez comencé con los objetos y dejé el fondo para el final (algo que supuestamente no debemos hacer, sino todo lo contrario).  Pero quería empezar por la parte "fácil" (se me hace muy difícil pintar esas telas del fondo... lo que he logrado aquí no se parece mucho a las telas reales, sino más bien son una especie de síntesis, y gracias a esto lo terminé más rápido).

Y una pequeña recomendación:  ¡NO manchar con colores oscuros como hice aquí, es casi imposible cubir ese tono con amarillo!

Yellow Still Life

This is the last still life we made at painting class this year. I'm proud of the result. It took me a really long time to finish it (only the hot water carafe on the left took me 6 hours). This time I started with the objects and left the background last (something we're not supposed to do, we're supposed to do the opposite). But I wanted to start with the "easy" part (I find the drapery background too hard... what I have achieved here does not look quite like the real drapery, I kind of "synthesized" it and finished it in almost no time at the end).

One recommendation: DON'T underpaint with dark colors like we did, it's almos impossible to cover with yellow later!!!


Tuve que cubrir todo el fondo con anaranjado para cubrir la mancha oscura
I had to cover everything in the background with orange to cover the dark underpainting

Y luego incluso añadí blanco encima para poder pintar los distintos amarillos...
And later I had to add white all over to be able to add the different yellows...


lunes, 31 de octubre de 2011

Bodegón Rojo

Ejercicio de Pintura: Bodegón Rojo - Óleo sobre lienzo - 65 x 54 cm
Red Still Life, Painting Exercise - Oil on canvas 26 x 21.6 "

Este bodegón es el tercero que hacemos en la clase de Pintura I (El segundo fue el azul, pero aún no lo he terminado :P lo pondré Dios mediante cuando lo termine...). Pasé por todas esas etapas de desesperación, desánimo, pérdida de esperanza, depresión y todo eso que se siente cuando se está aprendiendo... (dolores de parto, según me decía Marisol, antes de parir un cuadro :)

Al final descubrí la pólvora pues, y quedé contenta con el resultado (y después de tanto esfuerzo!)

Al final unas fotos del proceso que tuve para terminarlo...


Red Still Life

This still life is the third that we do at Painting Class I (the second one was the blue, but I haven't yet finished it :P I'll post it when finished...).  I went through all those moments of despair, discouragement, loss of hope, depression and all that that you feel when you're learning... (labor pain, as Marisol used to say, before you give birth to a new painting :)

At the end I discovered what everybody knows, and ended up happy with the result (after all that effort!)

Here are a few pics of my process...


martes, 27 de abril de 2010

Papagayo

Papagayo 02 Papagayo 01 001

Papagayo – Macaw

Lápices de colores Faber Castell CPs, papel/paper Mi-teintes

19x15 cm - 7.6” x 6”


Hay cosas que me resultan más fáciles y que disfruto más (no es que me salgan totalmente bien, pero me SIENTO bien haciéndolos). Los paisajes definitivamente no están en este grupo :) Admiro a las personas que son capaces de simplificarlos y plasmarlos en una pintura.

En la categoría de NO PAISAJES está este papagayo. Aún no lo he terminado, pero lo estoy poniendo porque se acaba el plazo para incluirlo en el segundo reto de Monthly Sketch Project. La foto nuevamente es de ffyrebird, ¡gracias!

Actualización: Bueno, lo terminé. He puesto la foto nueva primero.

Macaw

There are things that I find easier and that I enjoy more (it doesn’t mean that I end up with a master piece, but I FEEL GOOD during the process). Landscapes are definitely not in this group :) I admire people who are able to simplify them and paint them in a painting.

This macaw belongs to the NOT LANDSCAPE category. I haven’t finished it yet, but I’m posting it because today is the due date for the second challenge at the Monthly Sketch Project. The photo belongs to ffyrebird again, thank you!

Update: Well, I’m done. I’ve included the photo first.

miércoles, 14 de abril de 2010

Pagoda Nocturna

Pagoda Nocturna 04 001 Lápices de colores en Mi-teintes negro, 24 x 32 cm
CPs on black Mi-teintes, 9.5 x 13” appx

Este dibujo lo hice para el primer reto de abril del blog Monthly Sketch Project. La foto de referencia es de ffyrebird.

Desde que vi la foto supe que la iba a hacer en papel negro. Hace tiempo que quería volver a pintar en este papel, y la piedra blanca de la pagoda me parecía perfecta para usarlo, bajo la luz de la luna, rodeada de algunas hojas de palmera, y quizás de algunas enigmáticas nubes. Y bueeeno… no salió como lo había imaginado, jejeje, pero ni modo. Me divertí haciéndolo. Recordé poner los colores atmosféricos en las luces reflejadas en la piedra, pero soy malísima para darle uniformidad a los lápices de colores, sobre todo en el fondo, bfff… Y finalmente, no supe cómo resolver el primer plano, la parte del jardín delante de la pagoda… si alguien se apiada y tiene alguna sugerencia, será bienvenid@ (no prometo hacerlo, pero sí considerarlo :)

Night Pagoda

I did this drawing for April’s first challenge of the Monthly Sketch Project blog.  The reference photo is from ffyrebird.

From the moment I saw this photo, I knew I was going to draw it on black paper.  It had been a while that I wanted to use this paper, and the white stone of the pagoda seemed perfect to use it, under the moonlight, surrounded by palm tree leaves, and maybe by some mysterious clouds. And we-e-ell… it didn’t come out as I portrait it in my mind hehe, but what else could I do? I had fun doing it.  I remembered to put the atmospheric colors on the reflected lights on the stone, but I’m really bad at achieving uniformity on the cp’s strokes on the background, *sigh*… And finally, I couldn’t resolve the first plane, the part of the yard in front of the pagoda … if there is someone out there merciful enough to give me any suggestion, it will be very welcome (I don’t promise to actually make it, but to seriously consider it :)

Aquí está el paso a paso/Here’s the step-by-step:

Pagoda Nocturna 01 001 Pagoda Nocturna 02 001 Pagoda Nocturna 03 001 Pagoda Nocturna 04 001

martes, 2 de junio de 2009

Una Anémona en Progreso

Hoy voy a hacer algo demasiado osado para mi gusto, y que ya he hecho anteriormente: Poner un trabajo en progreso. Ya sé la tensión que esto significa, el incremento de presión a mí misma porque ahora la pintura DEBE salir bien. Pero el último post es un poco aburrido, así que mejor pongo algo más creativo.
Me inspiré a hacer esta animalito al leerle un libro a mi hija antes de dormir (la enciclopedia de Winnie Pooh sobre animales marinos). Las fotos son lindas. De allí salió justamente mi modelito.
Otra parte de mi inspiración salió del blog Leslie's Art Blog. Cuando vi su dibujo quedé fas-ci-na-da y me dije a mí misma que tendría que intentar algo en ese estilo algún día. Ahora lo estoy haciendo, espero quedar contenta con los resultados. Ya veremos... (ahora es cuando cierro mis ojos y presiono "publicar")


"..."


Today, I’m going to do something too daring as per my philosophy. Something that I have already done: post a work in progress. I know about the tension this means, the raise in self-inflicted pressure because the painting MUST now turn out well.
But my last post is a little bit boring, so I’d better post something a bit more creative. My inspiration to paint this creature came from reading a bed time book to my daughter (Winnie Pooh’s encyclopedia of marine animals). Photos are cute. That’s where I got my little model.
Another part of my inspiration came from Leslie’s Art Blog. When I saw her drawing I was fascinated and told myself that someday I ‘d have to try something on that style. Now I’m on that, I hope at the end I’ll be happy with the outcome. We’ll see… (now is when I close my eyes and click on "publish post")
Related Posts with Thumbnails